
Tokyo Chronos is a videogame made for VR users using Oculus (PC) and Vibe. The intro trailer animation was created with Blender as most of the assets inside the game. The game was a huge success in raising funds in Kickstarter. We will review some key notes in the production of this awesome VR game. The creator challenged himself into learning Blender to produce an animation intro trailer video.
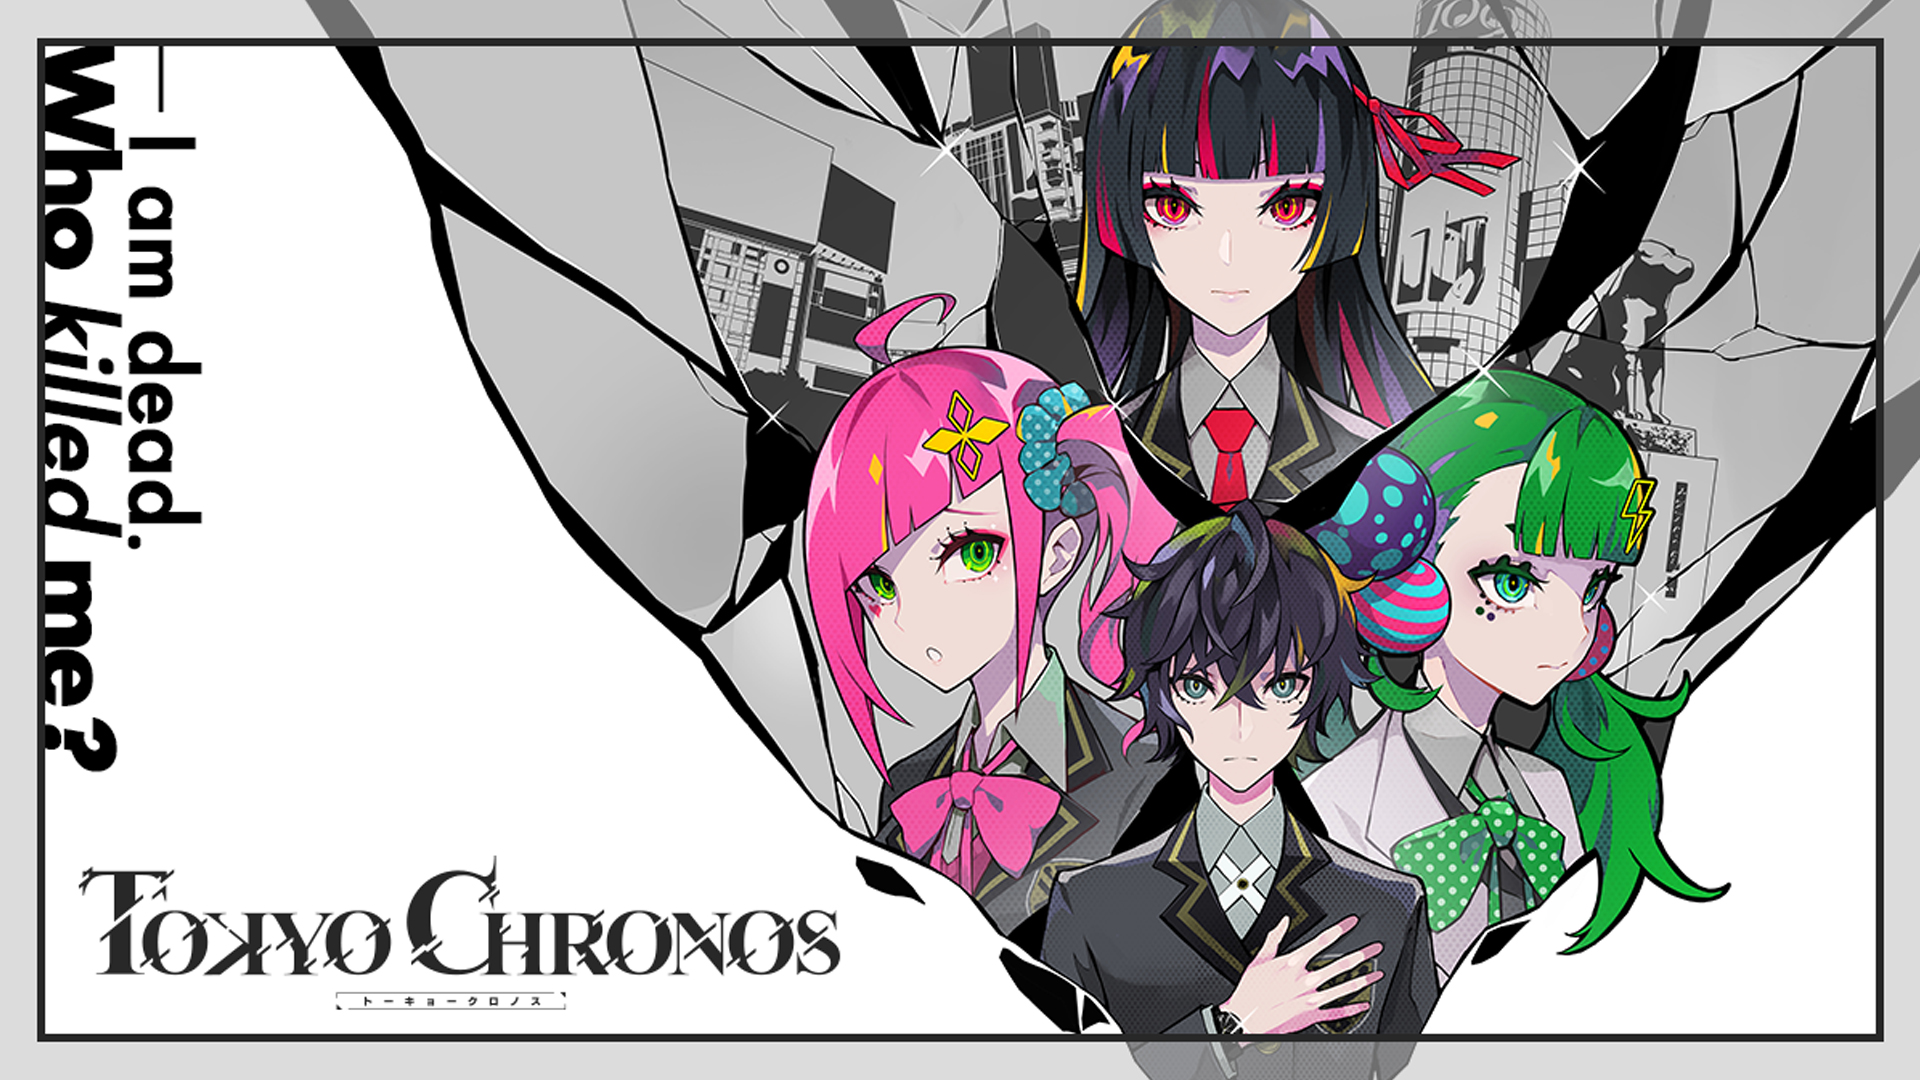
In Tokyo Chronos, players follow Kyosuke Sakurai. He has woken up in the frozen Chronos World version of Shibuya. He was the leader of the group of friends, which consisted of Ai Morozumi, Karen Nikaido, Sai Kamiya, Sota Machikoji, Tetsu Kageyama, Yu Momono, and Yuria Togoku. However, something seems to have happened that resulted in people being separated. People are disappearing and dying.
Official “Tokyo Kronos” site>>

Software used to create animation
Blender was used as main 3D application, AfterEffects was used for further effects and compositing and ClipStudio was used to create the storyboards. The modeling was performed by Nikaido, Sakurai and Momono in Maya. Mr. Kishigami did the rig setup and line setup for the characters “and I did it all with Blender“, he mentions. Rig setup basically uses AutoRigPro.
He continues : “As for the line setup, I used the book reference “Making in Tohoku Zunko! Anime character modeling” (http://amzn.asia/eVBZzzX) by Mr. Masamune Tsuji.
The lines are jagged when rendered normally, so I’m doing things that are rendered with double resolution and reduced to half the size to later composite them into the character using AfterEffects (I really like this technique as this is how they did it on a CG animation called FREEDOM long ago …)”
“The overall message flow of the video raises full of color when the tension goes up and becomes rusty, and the last part of the video is color toned to evoque a calm sensation. This is why we also see a basic monochrome. Although the title came out and the name of Dawn and the staff came out, the information comes out in a word and two words added at the end is the MGSV trailer pacifier which I like completely. The first Nikaido stands and I feel that there are no cuts in the back view. There is still a lot to improve, but time was of the essence. I would still be refining details now.” -Mr. Kishigami adds diligently.
“Basically, I showed the model in the trailer in the direction of not using weak angles and not using lens distortion. I refer to weak angles like “face tilt” and “extreme eyebrows”; and not using the lens effect means that “100 mm” telephoto is projected as a standard lens setting.
In the background, I used what I photographed in the city of Shibuya by myself in monochrome and then used AE for the post processing. The camera I used was RX-100M5. I might have worked a little more. -The floor on the background of the trailer where the note falls, is the floor of my home. I spread the script for recording voice actors on the floor and took a wide angle shot.
I did the title and typographic cuts by myself at first, but I wanted to get it finished in a good way, so I asked Mr. Kato for the lightning company.” -Mr. Kishigami said. Check out the trailer:
Hand-drawn animation.
Hand drawn animation was used on the first part of the video where the line of light flies within the framed view. Mr. Kishigami created it in Clip Studio timeline. The second time hand drawn animation is used is where the ribbon of Nikaido flies. This was also drawn by hand as usual. He even printed it to flip it and corrected and he says “I felt it was solid (blocky) but I used it as it was”. The third time is cut hair that Nikaido raises her head slowly with a scary face just before the title. “This was done by cutting the AfterEffects mask into that shape and animating it as I imagined it“, Mr. Kishigami adds.
“Broken pieces were created in Blender. It was possible to do it by simpler operations than 3Ds Max which I also have experience with. I made the effect with the help of Mr. Kouhei Koji by asking how to do it. I´m grateful for his help on this. I started making this trailer at the end of May (2018), and I really started doing it from the beginning on the third week of June, and completed just a week later. It was quite a rush, but I think that it costed too much because I came home after two long weeks non-stop.”
Mr. Kishigami mentions: “This time, I made an old-fashioned CG animation like in Blender and AfterEffects, but this is the physical strength and mental power to create that is tough, I would like to try new methods in realtime using Unity“.
Tokyo Chronos will come to the HTC Vive and Oculus Rift on March 20, 2019 and the PlayStation VR in July 2019. It was a Kickstarter success story that raised $90,625 from 970 backers in August 2018. Check out the demo:
Stay up to date from developer notes himself in this link
Sources:
Link1 >>